This article came out of some learning from my blog series about the things I wish someone had told me when I started using JMP. I realized that I wanted to make several graphs in the articles interactive. I knew I could create the interactive graphics in JMP and move them to JMP Public. But I didn't know how to do the bit where I embed the JMP Public content in the article.
So, here is how to do it. And yes, you're going to see some code. It's OK; you don't have to edit it. Here, look at this picture of a puppy and take deep breaths until you're ready to continue.
 See the happy puppy - it's not worried about seeing code. Be like the happy puppy.
OK, you better now? Awesome. Now buckle up, because this will change your world – or at least change how you blog a little.
Setting Up the Report for JMP Public and Publishing
Step 1 – Run an analysis in JMP
You can find details on this step pretty much anywhere in the JMP User Community. There are three things to pay attention to here:
- Keep your data set small.
- Pay attention to the size of your graphics. Below are two examples. The first one I optimized for viewing in a browser; the other I optimized for viewing in a blog. Just keep that in mind.
- Remember that what you put on the web stays on the web!
Step 2 – Publish the analysis to JMP Public (or JMP Live)
I'm not going to reinvent the wheel by duplicating content. Have a look at this blog post: Posting to JMP Public
Just note that you want to have the JMP Public page opened when the upload is successful.
Step 3 – Get the iFrame content
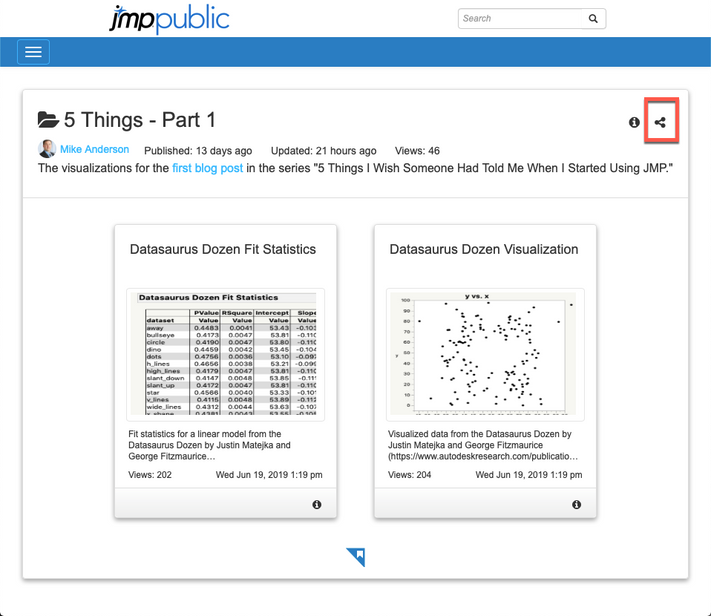
If you don't have your JMP Public page open, do so. Go to the icon in the upper right-hand side of the window.
Select "Embed Code (iFrame)" from the list. You've now got the HTML code needed to embed the content for that report using something called an iFrame. 
Putting the code in a post (using this blog as an example)
The JMP User Community is built on top of a system called Khoros (formerly known as Lithium). I'm going to use that as an example, but this will work with anything that will accept an iFrame.
In my case, I created a new blog article, and this opened an editor. In the editor, I have the option to work in Rich Text (what most people do), to see the HTML code (most people pretend that doesn't exist), and then get a Preview of what I'm going to get when I click "post."

When I click the HTML tab, the editor shows me the code for what I've written in the Rich Text tab.

All I have to do is locate the point where I want to insert the iFrame code is and paste it there. I find this is easiest to do by entering a couple of blank lines where I want my iFrame to go. Then I have to find them in the HTML (they look like this: "<p> </>") and then locate the last paragraph marker (looks like this: "</p>") before them. I put my cursor there (you can start a new line if you'd like) and hit paste (CTRL or command + V). It should look like this:

Now that the iFrame is in the HTML, I can go the Preview tab and have a look at the embedded JMP Public content.

And that's it. A little cutting and pasting, and you can integrate JMP Public content into a blog post or webpage. The only legwork you may need to do is research the specific method for inserting an iFrame, but it should look similar to the one I've shown here.
Happy blogging!