The following is a step-by-step guide for sites that wish to provide their users with an instruction set to install JMP® on their machines.
Note: This SAS Note is not intended to address any environmental or system-related issues that might arise during the installation process. If any deviations are encountered during the installation, verify whether you are running a version of JMP supported by your operating system as listed in JMP System Requirements (Windows). Otherwise, contact your IT Administrators. You can also contact JMP Technical Support via Technical Support Services.
1. Download the JMP Software Depot locally on your computer.
2. Install JMP:
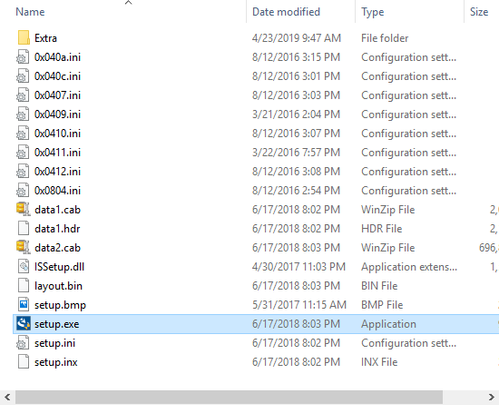
Navigate to the /JMP/JMP/<version>/Windows directory and double‐click the JMP installer setup.exe file. Note: For JMP 16.2 and higher, this folder will contain a single-file installer named jmp__version__win.exe.
Note: Right-click the installer file and choose Run as Administrator to install JMP with the highest privileges possible. If you are prompted to enter a username and password, contact your IT administrator to help you with the installation.
 Figure 1
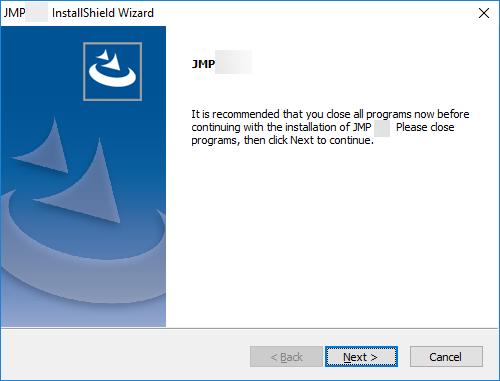
a. Click Next at the InstallShield Wizard window.
 Figure 2
b. Click Next at the Choose Destination Location window.
 Figure 3
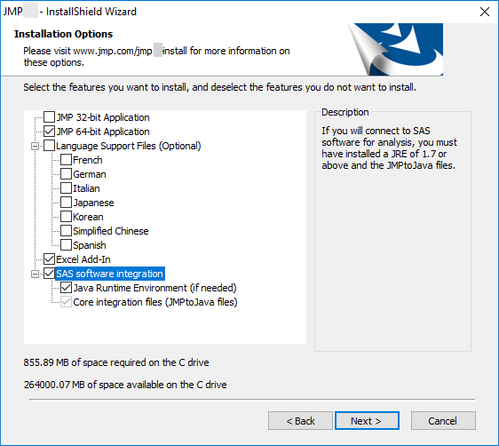
c. Click Next at the Installation Options window.
Note: These options are explained below:
- Language Support Files (Optional) – Installs the language files needed if you plan to operate JMP under different display languages.
- Excel Add-in – Installs the JMP Excel Add-In within Excel.
- SAS software integration – Installs the JAVA components needed to connect to a remote SAS server from JMP.
 Figure 4
d. Click Install.
 Figure 5
e. Wait for the installation to complete at The InstallShield Wizard is installing JMP <version> window.
Note: JMP installs Microsoft .NET, Microsoft Visual C++ Redistributable(s), and other JMP support files.
 Figure 6
f. At the InstallShield Wizard Complete window, select whether you want to Create a desktop shortcut and/or if you want JMP to Check for JMP software updates.
 Figure 7
g. Click Finish.
3. To launch your JMP version, complete these steps:
a. Navigate to Start and select JMP version.
b. Click the Wait to Register or Register option.
4. When JMP is opened, it prompts you with the Open License prompt if JMP did not find a valid license in the sid_files (the folder within the folder JMP Software Depot) during the installation.
a. Click the Open License button.
b. Browse to the save location of the JMP Software Depot and navigate to /JMP/sid_files/.
c. Locate the license JMPversion_order-number_TS-site-#_Win_X64.txt file.
d. Select the file and click Open.
e. JMP should tell you the license was accepted.
5. JMP is now installed and ready for use.
Note: For a PDF of these instructions see the .pdf attached below.
[Previously JMP Note 64452]