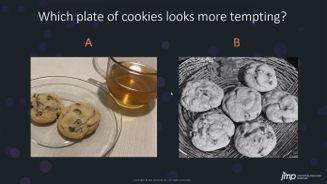
 For the last social event of JMP Discovery Summit Europe online, we wanted to give attendees a fun interactive experience.
We decided to create an online experiment involving cookies. Attendees took part in an experiment exploring what they find more tempting when looking at a plate of cookies.
This post is focused on the setup of that experiment. If you do not want all the details of the experiment and just want to see the results, go here.
Inputs and Responses
Even after deciding to do a cookie experiment, there were still many different factors we could change. But we realized that we needed to keep it simple since we were going to be asking volunteers to help with baking cookies and taking pictures. We stuck with one type of cookie, and produced a list of different factors that could be changed when taking a picture:
- Beverage: Milk / Tea / Coffee
- Type of Plate: Solid / Pattern
- Setting: Inside / Outside
- Number of Cookies on Plate: 2 / 6
- Image: Color / Black & White
- Use a Prop: Yes / No
While we can define these inputs, a proper response is difficult. A continuous response is difficult, particularly if we give a large set of photos (that is, how do you rate this out of 10?). We knew that we were going to call out for help, asking for volunteers to bake cookies and take pictures according to our instructions. We were not sure how many volunteers would help. And there was also the issue that, even with the same set of instructions, individuals would take quite different pictures. On top of that, we did not want volunteers to be burdened with taking too many photos when they could be enjoying their cookies instead.
If the experiment was going to involve comparing pictures, they should be by the same photographer. Asking each volunteer to take a pair of photos and having attendees pick their favorite seemed reasonable. And since there is no preconceived belief of any effect sizes or directions, I liked the flexibility of using Custom Design to set this up, as we have done before.
In JMP, from DOE->Custom Design, we specified the factors and levels:

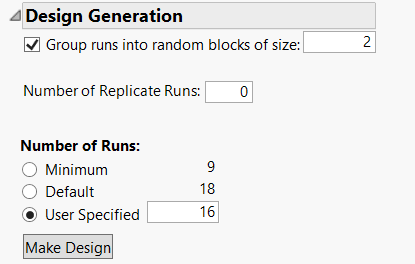
To create the “pairs of pictures” for each volunteer, we chose random blocks of size 2 that would give the settings for their two pictures. We initially set this up for 16 runs (that is, eight pairs of pictures), and main effects only, not knowing how many volunteers to expect.

Making the design, we had our original set ready to go.
The Curious Case of the Augmented Pairs
As it turned out, after a slow start, we ended up with many more volunteers than anticipated. This means we needed to augment the design. Because the first design was set up in Custom Design, Augment Design recognizes that random blocks of size 2 are required when selecting that column as one of the inputs when launching the platform:

In the original design, where main effects were specified, the pairs were effectively mirror-image pairs (except for beverage, with 3 levels); for each pair of photo instructions, whatever was used for the first picture would be the opposite for the second picture (that is, mirrored).
With the new set of volunteers, there were enough to specify the interactions. Even though we were looking at analyzing this as a choice model, this should still provide better exploration of the design space. To augment, we specifed 42 runs, which would provide photograph settings for the additional volunteers (there were a few rounds of augmentation, and a few batches that did not get made):

In the augmented design, what you may find interesting is that for many of the new pairs, only one or two of the factors change. That is, the photo instructions to a volunteer were quite similar. Why is it so different from the first set? The key is in the interactions. If all the factors are switched in the same set, then the interaction will have the same sign (think of this from the -/+ 1 perspective). Viewed in this way, it makes sense that those extra random blocks are different than the first set since we have now asked for the interactions.
Attached are the original design and the final design used (that needed a few modifications based on what the photographers had on hand).
Thanks for reading!
cookies_original_8_blocks.jmp
cookies_results_21_blocks.jmp
You must be a registered user to add a comment. If you've already registered, sign in. Otherwise, register and sign in.