- New to JMP? Let the Data Analysis Director guide you through selecting an analysis task, an analysis goal, and a data type. Available now in the JMP Marketplace!
- See how to install JMP Marketplace extensions to customize and enhance JMP.
JMP Blog
A blog for anyone curious about data visualization, design of experiments, statistics, predictive modeling, and more- JMP User Community
- :
- Blogs
- :
- JMP Blog
- :
- Learning from my mistakes -- Part 4: Are your measurements to be believed?
- Subscribe to RSS Feed
- Mark as New
- Mark as Read
- Bookmark
- Subscribe
- Printer Friendly Page
- Report Inappropriate Content
For Part 4 of my "Learning from my mistakes" blog series, I’m going to talk about measurement systems and the risks we run if we don’t understand them.
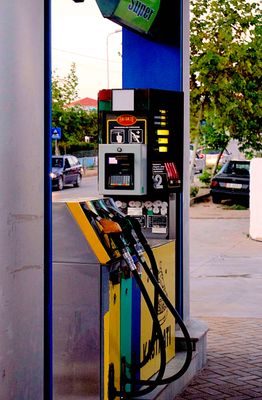
We all know what a measurement system is, right? Maybe it’s a gas pump has a digital readout. Or maybe it is a nurse measuring a patient’s pulse rate, or a grocery store worker judging whether the bananas are ripe enough (but not too ripe) to display on the stand. Each “system” is being used to measure some quality or quantity, so that a resulting judgement can be made.
If there is one thing that all measurement systems have in common, it is error. No measurement system is perfect, and if we don’t understand the capabilities of the measurement system, we run the risk of making mistakes based on the system’s output.
Over the years, I have seen a variety of mistakes when collecting and reporting measured data. Some of these mistakes include:
- Reporting too many digits on the measurement.
- Not reporting an uncertainty on the measurement.
- Using a gauge that is not capable of making the measurement you need.
We’ll address each of these in order. I don’t want this blog post to become a “how-to” guide for measurement systems analysis. (I’ll include some references at the end that point toward some helpful resources.) But I do want to point out some common flaws with the way people use measurement systems. I’ll follow that up with some advice on what to do if you find that your particular measurement system isn’t “good enough.”
Mistake #1: Reporting Too Many Digits on a Measurement

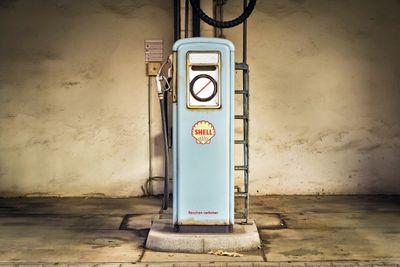
On the other hand, some of you may remember the “old style” gas pumps that might read to the nearest 0.1 gallon (if that). As a consumer in this age of higher gas prices, wouldn’t you like to be a little more confident in how much gas you just pumped, to make sure you weren’t overcharged?
I’ve seen both kinds of mistakes in my industrial experience. If you were sitting in a meeting and someone presented data, how would you respond to each of the following two statements?
- "I measured one of Product A at 97.3275412, and one of Product B at 98.2021929"
- "Product A measured 97, and Product B measured 98"
To the audience, if the first statement is made, it implies a very high degree of accuracy in the measurements. A conclusion might be made that Product B is clearly higher than Product A, and by a very specific amount. On the flip side, a savvy listener may question whether the presenter knows what he is doing, as very few gauges can produce that kind of accuracy.
If the second statement is made, the audience may come away with a "softer" feeling about the difference between the two products. The audience may be led to start asking questions about the repeatability of the measurement system, and/or whether the measured parts are truly different.

Fortunately, it turns out that there are simple ways to figure this out. In fact, a method called EMP (Evaluating the Measurement Process) give you the proper number of digits to report, based on the gauge’s perfance capability. We’ll talk about EMP a little later in this post.
Mistake #2: Not Reporting Uncertainty on a Measurement
Continuing with the above example, there is another problem with the statement of measured values. Our measurement system is imperfect (to one degree or another). Let’s say we use our gauge to measure one part, over and over. Measurements aren’t going to be the same, because we have random errors in our gauge. We obtain the following values for the first 3 readings on this single part:
98.2
97.3
98.5
So what is the measured value for this part? Assuming the part itself isn't changing between readings, the gauge must be introducing variation into the readings. Furthermore, what if the lower spec limit for this part was 98. Is this a good part, or a bad part? How should we report a measured value for this part?
If we could understand our gauge's capability, we would be able to express an uncertainty for the gauge. For example, a single measurement might have an uncertainty of ±2.1 units, so our reported measurement might be 98.2 ± 2.1 units. This gives the consumer of the information an idea of just how good (or bad!) this measurement was.
How do we get this gauge uncertainty? The uncertainty is based on the total gauge error, which is due to the error of the measurement device and error due to the gauge operator (often referred to as Gauge Repeatability and Reproducibility, or GR&R), along with the confidence level that you wish to report. You could choose 95% confidence, or 99% confidence, or you could specify something like the median error for the measurement system. (Of course, make sure your audience is aware of this uncertainty criteria when publishing your data!)
We will talk a bit more about Gauge R&R in the next sections. For now, the moral of this part of the story is: Never report a measured value without also reporting the uncertainty that goes with it!
Mistake #3: Using a Measurement System Incapable of Making Your Measurements
This topic may seem like an obvious mistake, but I have seen measurement systems that have unacceptably high variability that are still being used. Reasons vary from simple ignorance of the gauge’s capability to “It’s what we’ve always done” to “It’s the only gauge we’ve got.”
Using such an incapable gauge can lead to a multitude of problems. For example:
- If the poor gauge is being used to screen parts from a production line, we run the risk of discarding good parts and/or accepting bad parts, both of which cost money for the company.
- If the poor gauge is being used to monitor whether a production process is “in control”, we run the risk of either (1) masking an out of control situation because the gauge is adding masking noise to the system, or (2) spending time trying to resolve an out-of-control situation when the problem is really measurement noise.
- If using the poor gauge in an R&D environment, we risk not detecting differences between potential improvements because the gauge is incapable of measuring small (yet valuable) differences.
Understanding what your gauge is capable of measuring is critical to effective use of the gauge! The next section talks about a couple of simple and common ways to evaluate gauge performance.
The Start of a Solution: Understanding Your Measurement System
If you have seen any of the mistakes described above, take heart: There are tools available to address all of the problems in one way or another. Two of these tools (Gauge R&R, and EMP) are briefly described below.
Gauge R&R
Gauge R&R stands for Gauge Repeatability and Reproducibility, where “repeatability” represents the errors due to the measurement instrument itself, and “reproducibility” represents the errors due to operators using the measurement instrument.
Gauge R&R was born decades ago to address the need to measure production processes. It assesses the gauge’s performance either versus spec limits, or versus a spread of parts used to study the gauge. In essence, you want your Gauge R&R variability to be low versus either the spec range or the parts range, in order to minimize its contamination of measuring true values of parts.
Gauge R&R is a relatively simple process, often involving three operators measuring 10 parts repeatedly. Out of this comes estimates of the amount of gauge variability versus either specs or parts. The proportion of gauge variability to total variability can then be used to judge the gauge's performance. There are many references for Gauge R&R. Several will be listed in the references at the end of this post.
EMP
Several years ago Donald Wheeler took a new look at traditional Gauge R&R. Calling it Evaluating the Measurement Process (or EMP), Wheeler looked at the measurement system in terms of whether it was likely to detect if a process went “out of control.” (Note that JMP recommends using EMP as a standard practice, though both EMP and Gauge R&R are available in the software.)
Recall that whether or not a process is in control does not depend on product specs or ranges of parts, but simply on the normal variation when the process is performing well (i.e., it is in control). Wheeler’s evaluation process determines the likelihood of catching out-of-control conditions for a given gauge. Along the way, Wheeler develops things like the “Median Gauge Error,” which is helpful when establishing the uncertainty to report with the gauge measurements. He also determines the proper number of significant digits to use when reporting gauge measurements. The process for performing an EMP (multiple operators, multiple parts, repeated measurements) is the same as a traditional GR&R, but the ensuing calculations differ. JMP handles all of this for you automatically.
As with Gauge R&R, you can find references for EMP at the end of this blog post.
My Gauge Isn’t Good Enough — What Do I Do Now?
As I’m sure you have gathered by now, not all gauges are adequate for the measurements we want to collect. So now what do we do?
There are several options that we can consider. Each has pros and cons. Some involve using the current gauge, while others require finding a new measurement system.
Options for using the same gauge include measuring parts repeatedly, measuring more parts, improving operator training and improving fixturing. Let's look at each of these.
Measure Parts Repeatedly
You might want to take advantage of measuring the same part multiple times. Averaging multiple measurements provides a better estimate of the true value of the measurement of an individual part.
Essentially what we are doing is redefining the “Measurement System” such that the measurement process includes making multiple measurements on any given part, as a part of the standard measurement process. Note that “multiple measurements” means starting from scratch each time, so for example a part would have to be removed and replaced in the fixture in order to account for mounting errors, etc., else you may end up biasing your measurements in one direction or another.
Of course, multiple measurements can lead to more time to make the measurements, which is an expense in and of itself. And if this limits production rates, you may need to build duplicate gauges anyway. It also won't work if the test itself is destructive to the part under test.
Measure More Parts
Similar to "Make More Measurements" described above, increasing the number of parts (i.e., sample size) can also improve your estimate of the mean of the population. In this case, we are essentially considering the total variance of all parts to be made up of the parts variance itself plus the Gauge R&R variance, so the total variance will be inflated. The Measurement System's procedure would then involve measuring N parts each time, which gives us a better estimate of the population mean, even with the high gauge variance.
Of course, the drawback is that measuring more parts takes more time, and (in the case of destructive testing) costs more in terms of the sample parts. Still, the average can be used when comparing two or more samples via t-tests and ANOVA, or if running process control charts.
Improve Operator Training
Depending on the results of your gauge evaluation, you may find that much of the variance comes from one or more operators. While you should be careful not to embarrass anyone, often you can find ways to retrain your operators to make better measurements. Occasionally (for example if someone's eyes aren't good enough to accurately perform a given task), you may need to change out this operator for someone more capable of making the measurements.
Improve Fixturing
Sometimes a part needs to be mounted in a fixture before the measurement is made, and the orientation of the part (for example) affects the measurement. In this case, you will need to study the fixture design and remove its variability.
One caveat: Say you are measuring the diameter of a part, and you place your part in a fixture for the measurement. If the fixture always orients the part in the same way (in an angular sense), you may get much improved measurement variability. However, if all parts are "egg-shaped," and you always orient the part so that the widest diameter is measured, you may have great measurement repeatability while missing the actual property that you are trying to detect!
So those were the options for using the same gauge. There are also options for changing gauges: buying a new gauge, building a new gauge and finding a different quantity to measure. Let's look at each of these options.
Buy a New Gauge
This may seem obvious, but if the old gauge isn’t good enough, can we simply buy a better gauge? This may involve exploring how the old gauge works. Can we buy a more accurate sensor? Is the variance coming from the signal conditioning electronics? Do we have to replace the entire measurement system, or does replacing individual parts reduce our variation?
Often buying a new gauge is the easiest solution, though it can cost significant money to purchase the new system (particularly if multiple gauges need to be replaced), and can cost time in terms of ordering and qualifying the new measurement system.
Build a New Gauge

One caveat to building your own gauge: You may be expected to support that gauge going forward. This could be viewed as a positive (i.e., job security) or as a negative (extra responsibility that may not be rewarding to you). Either way, if you are considering building a new gauge, take into account the additional support and/or transition issues that might go along with the undertaking.
Find a Different Quantity to Measure
Have you really thought about what you are measuring? Is there another quantity that could be measured instead? For instance, linear drag devices to measure friction between parts can be temperamental. Instead of linear drag, how about making disks of the materials and measuring torque to turn the flat surfaces against each other? Or how about using a laser scanner to measure the surface roughness? There is often more than one way to cook an egg! Again, cost and time are issues.
Resources
If you are looking to learn more about Measurement Systems Analysis, here are some useful links and references:
- Wheeler, D.J. (2006). EMP III Using Imperfect Data. Knoxville, TN: SPC Press.
- Recorded JMP video: Evaluating and monitoring your process using MSA and SPC
- Upcoming live JMP webinar: Evaluating and monitoring your process using MSA and SPC
- JMP white paper: Evaluating the Measurement Process: A Better Way to Do Reliability and Reproducibil...
- JMP book: Douglas Montgomery’s Introduction to Statistical Quality Control: A JMP CompanionNew
- Free JMP online course: Statistical Thinking for Industrial Problem Solvers: Quality Methods Module
And of course you are always welcome to contact me for help.
Coming Up
I’m planning to touch on all of the following subjects as we go along. Hope you can join us!
- Part 1: Laying out a typical scenario
- Part 2: What does the t-test really tell us?
- Part 3: Other test considerations, and Ask the Complete Question
- Part 4: Are your measurements to be believed? (this post)
- Part 5: Planning and running the test: from sample sizes to best practices
- Part 6: Analyzing the results (including Garbage In = Garbage Out)
- Part 7: Summary
Ready to try JMP? Get the complimentary 30 day free trial!
You must be a registered user to add a comment. If you've already registered, sign in. Otherwise, register and sign in.
- © 2026 JMP Statistical Discovery LLC. All Rights Reserved.
- Terms of Use
- Privacy Statement
- Contact Us
