The Excel Import Wizard was introduced in JMP 11 for Windows. The goal with the Wizard was to simplify the task of importing data that often did not follow the rule of “line 1 contains headers, line 2 starts the data”. Based on quite a bit of feedback, it seems that we were successful.
This blog will not detail how to use the Wizard. The documentation is a good resource for this, as is Chuck Pirrello’s video “Working with Excel Data”. Rather, I will aim to tell you what is new with the Wizard in JMP 12.
First, the Wizard is available on the Mac in version 12. We apologize for the delay with this, but please know that all of the functionality that you have had in the Windows release of JMP is now available on the Mac. All of the new features that I describe in this blog will be in the Mac version of the Wizard. Potentially of even greater significance for Mac users, the Wizard will allow you to open .XLSX formatted files. XLSX is the newer Excel format introduced with Excel 2007. Prior versions of JMP required Mac users to open XLSX files via an ODBC driver, which could be cumbersome.
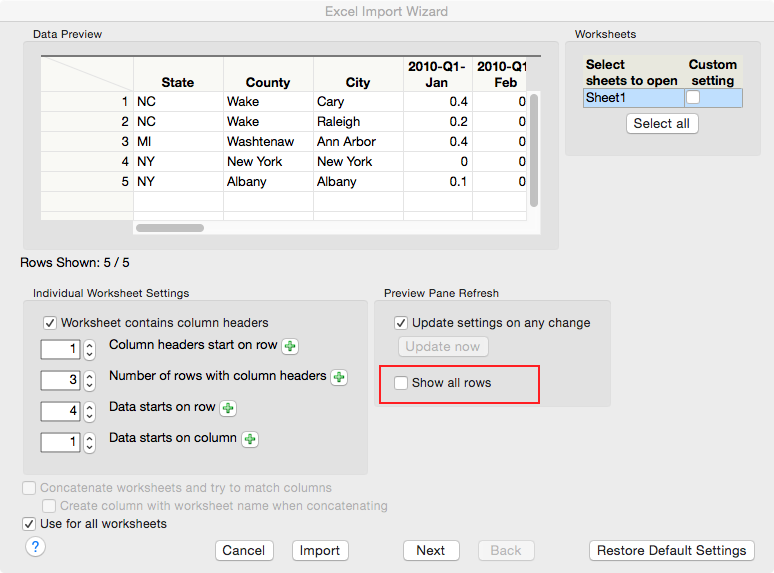
The Mac support is the biggest news in version 12. Based on user feedback, we have added a few more features. The first is the “Show all rows” support. This aims to solve two requests. First, some users want to see all of the data in large tables, not just the first 100 rows. By checking this box, you will now get a preview of the entire worksheet. This also makes another important adjustment that you can’t see. It uses all of the data in the column to guess the data type for the column. Users ran into cases where they had a large number of rows, and the last few rows contained some character data. Since JMP would use the first 100 rows to guess the data type, it could guess a numeric type. If row 205 contained character data, it could be lost when the worksheet is imported because the character data cannot be represented in a numeric cell. By checking the “Show all rows” option, character data that is discovered far down in the column will cause the column to be typed as Character to preserve all of the data. Please know that if you select this option, large tables could take a considerable time to load.

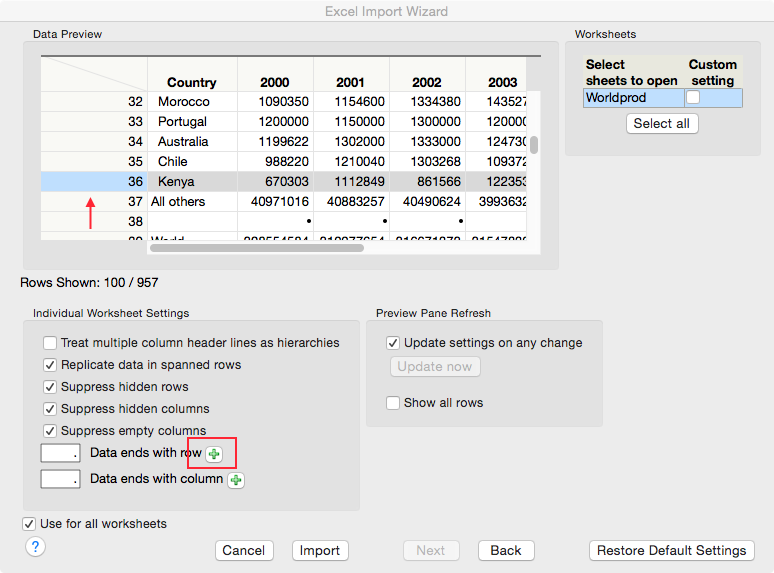
The green plus signs that you see next to the settings labels are new in version 12 as well. By first selecting a row or column, and then pressing the green plus button next to the desired setting, JMP will calculate the correct row or column number for the setting. This can be important for cases where there are hidden rows or columns, or where the data does not start on the second row but you are no longer viewing the empty rows prior to the start of the data.
An example of using the green plus is the data below. There are observations and text below the last country (Kenya) that I don’t want to import into JMP. I can select the row that highlights “Kenya”.

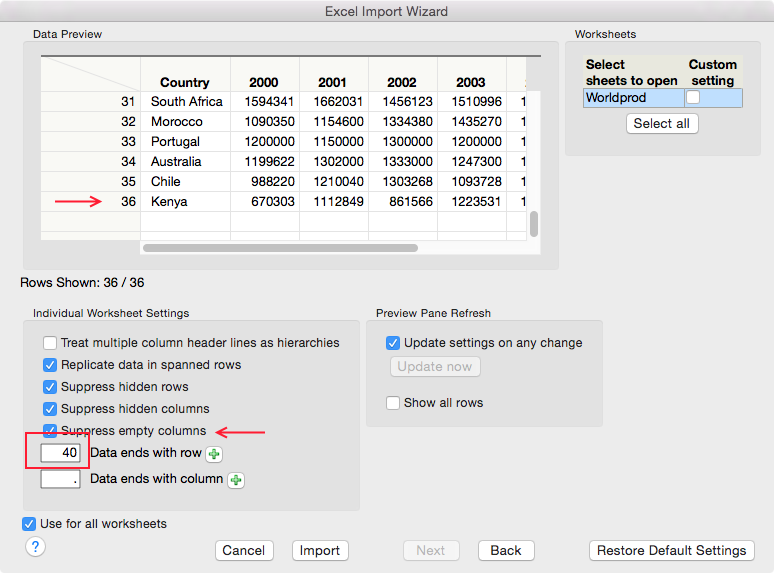
JMP will figure out that the row in question is in fact row 40, and it will fill in the field and update the display.

Finally, the screenshot above also shows one final option. Sometimes workbooks contain columns that are empty, but the column header itself conveys important information. By unchecking the “Suppress empty columns” option, the empty column will be imported. By default, JMP tries to remove this type of column.
I hope this gives a good overview of the changes to the Excel Import Wizard in JMP 12, and also shows you how easy it is to import your Excel data into JMP.